

First of all, let's define Stable Diffusion. Stable Diffusion is an open-source machine learning model that is capable of creating images from text, altering images based on text, or adding information to low-resolution or low-detail images. Also, it can produce outcomes that are comparable to those from DALL-E 2 and MidJourney as it was trained on billions of images. Such a model was created by Stability AI and made available to the public for the first time on August 22, 2022.
Unlike several AI text-to-image generators, Stable Diffusion doesn't have a clean user interface (yet), but it has a very permissive license, and luckily it is open-source so we can use it on our PC and maybe fine-tune it to do other customized image generation tasks.
Unlike several AI text-to-image generators, Stable Diffusion doesn't have a clean user interface (yet), but it has a very permissive license, and luckily it is open-source so we can use it on our PC and maybe fine-tune it to do other customized image generation tasks.
What Do You Need to Run Stable Diffusion on Your Computer?
To be able to run a stable diffusion model on your computer, the latter should at least be a Gaming Laptop with the following requirements:
- A GPU with at least 6 gigabytes (GB) of VRAM, this includes most modern NVIDIA GPUs
- 10GB (ish) of storage space on your hard drive or solid-state drive
- The Miniconda3 installer
- The Stable Diffusion files from GitHub
- The Latest Checkpoints (Version 1.4, as of the time of writing, but 1.5 should be released soon)
- The Git Installer
- Windows 8, 10, or 11
- Stable Diffusion can also be run on Linux and macOS
if you can't meet these requirements, consider using the Stable Diffusion model on some cloud-based platforms such as Google Colab which give a free GPU limit. Moreover, if you just want to explore and generate some images using Stable Diffusion you can use a web-based AI image generator or use some web apps that let you generate images using Stable Dissuion API.
How to Install and Run Stable Diffusion on Windows
to install Stabe Diffusion on Windows you need first to install Git installer and anaconda 3 or miniconda 3.
1. Install Git
Git offers an easy way to access and download these projects if you're not a developer, therefore we'll use it in this situation. Installing Git requires running the Windows x64 installer that may be downloaded from the Git website.
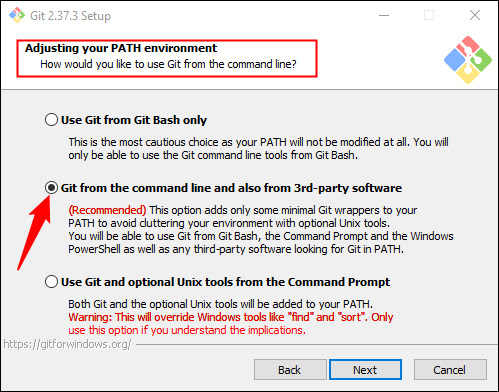
While the installer is running, you'll be given the opportunity to choose from a number of choices; keep them all set to the default values. The "Adjusting Your PATH Environment" options page is a crucial one. "Git From The Command Line And Also From 3rd-Party".
2. Install Miniconda 3
In essence, Miniconda3 is a tool for convenience. It enables you to manage all of the libraries needed for Stable Diffusion to run without requiring a lot of manual labor. It will also be how we apply stable diffusion in practice.
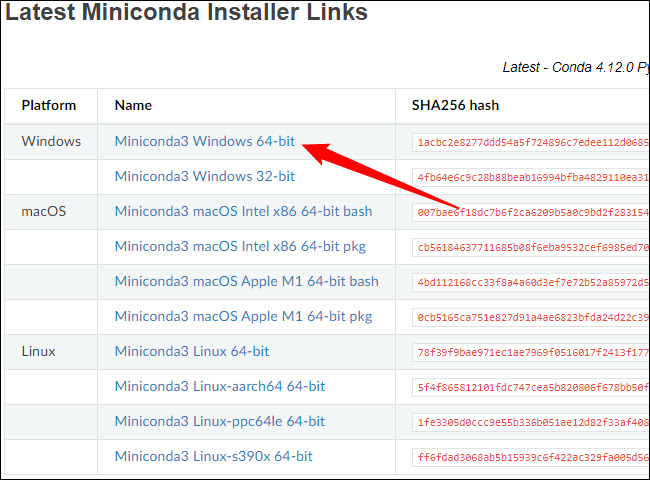
Get the most recent installation by visiting the Miniconda3 download page and selecting "Miniconda3 Windows 64-bit."
Once it has downloaded, double-click the executable to launch the installation. Installation with Miniconda3 requires less page clicks than with Git, however you should be cautious with this choice:
Before selecting the next button and completing the installation, be certain that "All Users" is selected.
After setting up Git and Miniconda3, your computer will ask you to restart. Although we didn't think it was necessary, it won't harm you if you do.
Now that we installed Git and Miniconda 3, it is time to get the Stable Diffusion files from Github:
3. Download the Stable Diffusion GitHub Repository and the Latest Checkpoint
We are now prepared to download and install Stable Diffusion as we have completed the prerequisite software installation.
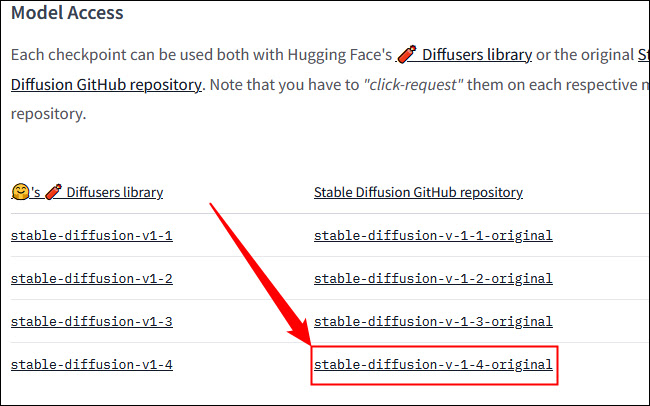
The most recent checkpoint should be downloaded first; version 1.4 is approximately 5GB, so it might take some time. To download the checkpoint, you must first create an account, but all they ask for is your name and email address. The rest is entirely up to you.
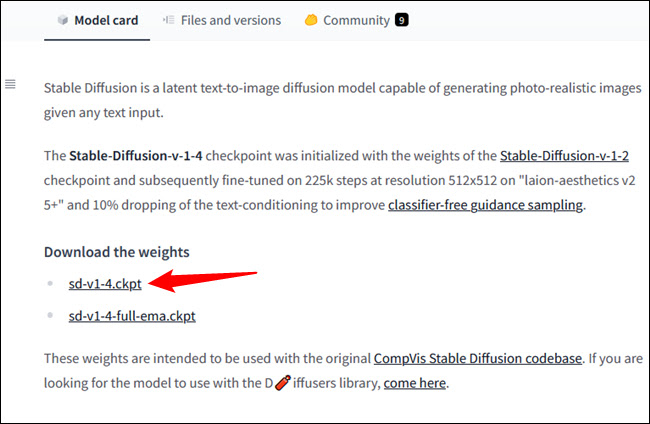
Click “sd-v1-4.ckpt” to start the download.
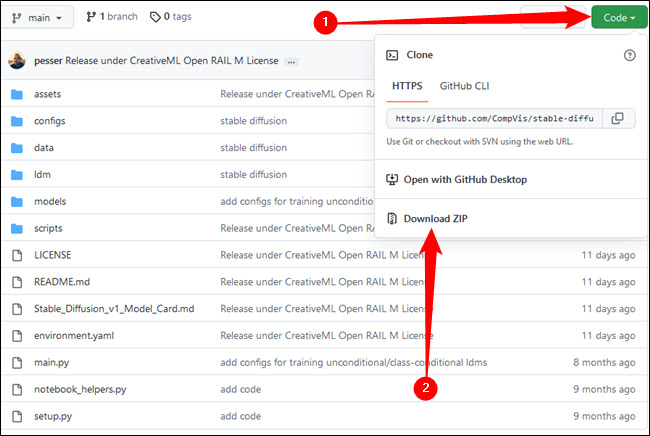
Stable Diffusion must then be downloaded from GitHub. Click "Download ZIP" after selecting the green "Code" button.
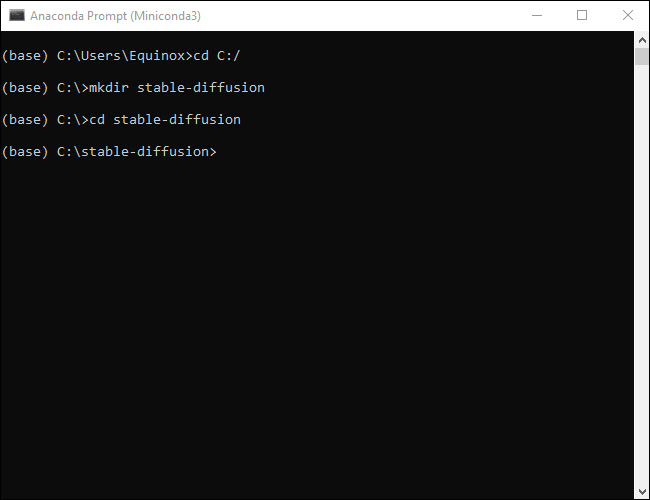
We now need to set up a couple folders where we can unpack the files for Stable Diffusion. Type "miniconda3" into the Start Menu search bar by clicking the Start button, then select "Open" or press Enter.
Using the command line, we'll make a folder called "stable-diffusion." Press Enter after pasting the following code block into the Miniconda3 window.
cd C:/
mkdir stable-diffusion
cd stable-diffusion
We'll need Miniconda3 again in a moment, so keep it open.
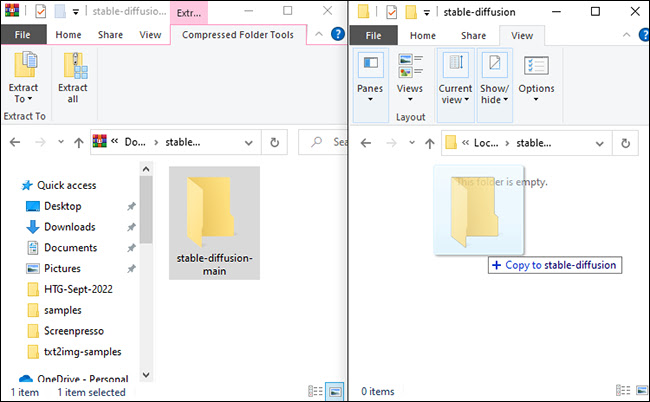
Open the "stable-diffusion-main.zip" ZIP archive that you got from GitHub in your preferred file archiver. If you don't have one, Windows may open ZIP files on its own as an alternative. Open a second File Explorer window and navigate to the "C:stable-diffusion" folder we just created while keeping the ZIP file open in the first window.
Drag and drop the "stable-diffusion-main" folder from the ZIP archive into the "stable-diffusion" folder.
Go back to Miniconda3, then copy and paste the following commands into the window:
cd C:\stable-diffusion\stable-diffusion-main
conda env create -f environment.yaml
conda activate ldm
mkdir models\ldm\stable-diffusion-v1
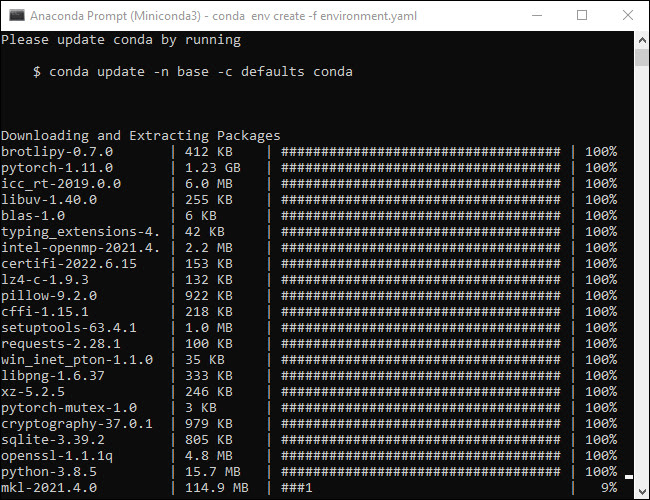
Note: don't halt this procedure. It can take some time to download because some of the files are more than a gigabyte in size. You must delete the environment folder and rerun Conda env create -f environment.yaml if you mistakenly pause the process. In that case, perform the previous command after deleting the "ldm" folder in "C:Users(Your User Account).condaenvs."
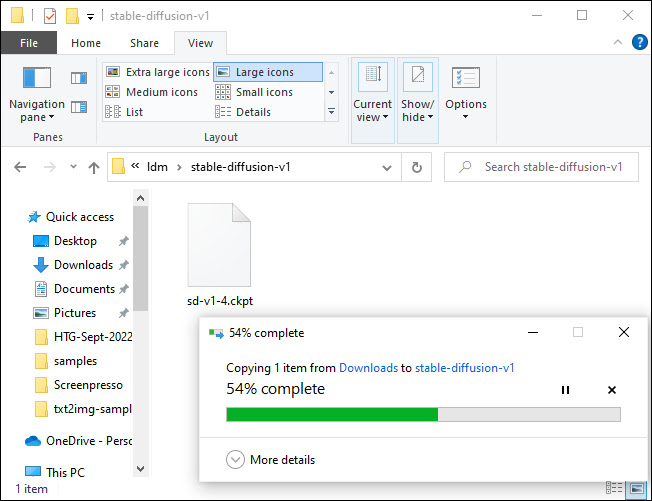
We've reached the installation's last phase. Copy and paste the checkpoint file (sd-v1-4.ckpt) into the "C:stable\diffusionstable\diffusion\main\models\ldm\stable\diffusion-v1" folder using File Explorer.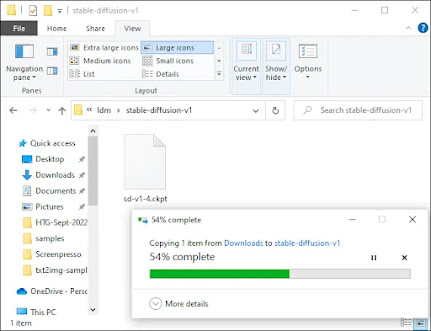
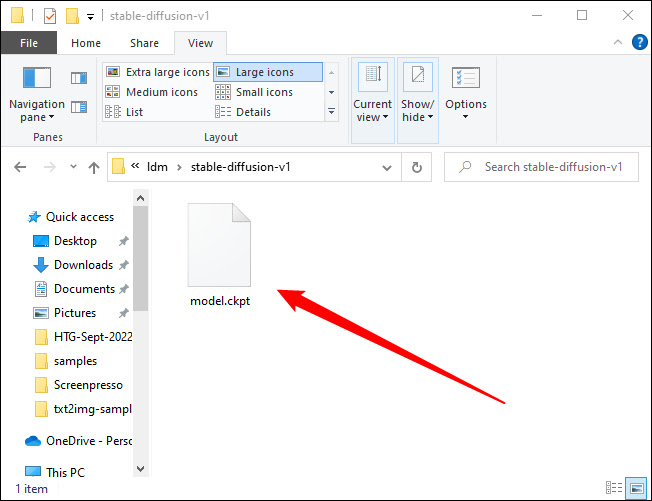
After the file has finished transferring, click "Rename" from the context menu when you right-click "sd-v1-4.ckpt." To rename the file, enter "model.ckpt" in the box that is highlighted and press Enter.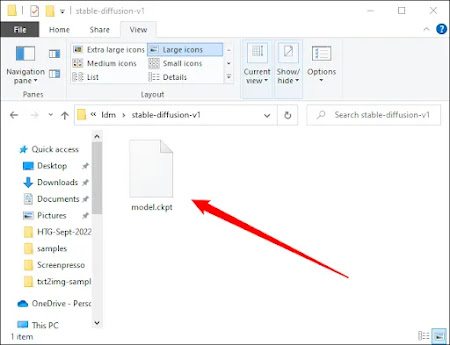
After the file has finished transferring, click "Rename" from the context menu when you right-click "sd-v1-4.ckpt." To rename the file, enter "model.ckpt" in the box that is highlighted and press Enter.
And with that, we are done. We are now prepared to use stable diffusion in practice.
Next Steps: in the next article we will show you how to run Stabe Dissuon on your system and get some results. Stay Tuned.
Comments
Post a Comment